
Early access · Release date: May 20, 2026
UpdatedDeep Rock Galactic Rogue Core Guide: Builds and Survival
Use this Deep Rock Galactic Rogue Core guide to choose a Reclaimer, build upgrade synergies, manage the timer, and unlock deeper missions with your squad.
Jump to
How to Get Started in Rogue Core
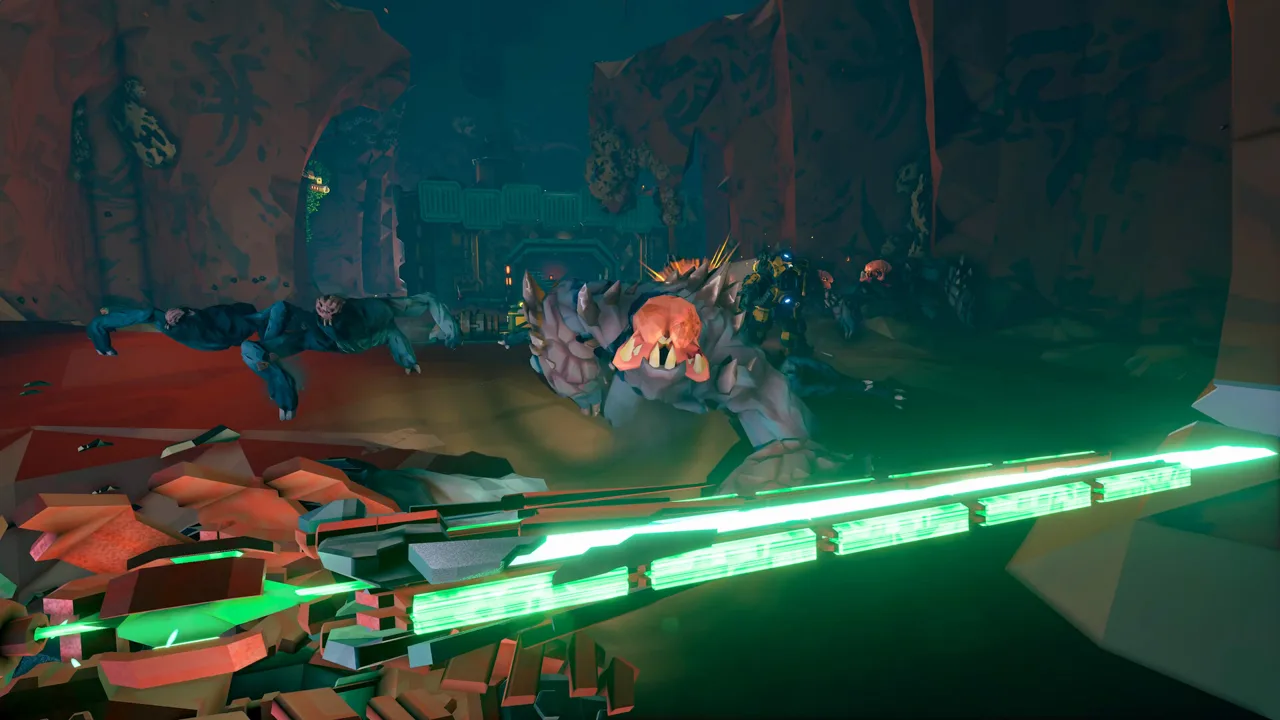
A cave full of upgrades means little if you leave yourself no time to escape. This Deep Rock Galactic Rogue Core guide walks you through choosing a Reclaimer, building useful synergies, and reaching the boss before your squad runs dry. Start with manageable mission settings and aim to finish floors with enough ammunition and time for the exit objective.
Rogue Core is a standalone roguelite with permanent character progression between missions. Each deployment starts with basic equipment, then weapons, upgrades, and abilities shape your build underground.
Several launch-era rules have changed. Update 2 separated difficulty from Depth, while Update 3 added enemy Expenite drops, rerolls, and alternative elevator objectives.
| Mission setting or feature | What it does |
|---|---|
| Threat Level | Five difficulty levels affect enemy numbers, swarm frequency, health, movement, aggression, and damage |
| Depth | Controls content progression; Update 3 opens Depth 4 and its Balgorath Gatekeeper fight |
| Assault Pace | Cautious lowers time pressure, Standard uses the standard pace, and Reckless increases time pressure |
| Facility length | Indicates how many floors precede the boss |
| Complexity | Describes how demanding the facility is to navigate |
| Priority Target | Grants a +10% Reclaimer Points bonus |
Choose a lower Threat Level and Cautious Assault Pace while learning the objectives. Check complexity before committing, especially when your squad is still getting comfortable with traversal tools.
You can join missions in Depths or biomes you have not unlocked yourself. Hosting those missions still requires the relevant Depth unlock.
For solo sessions, RC: EA:03:02:00 adds Save & Quit. Use Resume Mission to continue later, or Claim And Abort to end the saved run and collect its rewards.
Official page: Deep Rock Galactic Rogue Core (store.steampowered.com)
Choose a Reclaimer Around the Abilities You Want to Use
All five Reclaimers bring their own abilities, but your weapon and upgrade choices develop during the mission. Pick a class whose core tools you enjoy using, then shape the run around the equipment you actually receive.

| Reclaimer | Core tools | How to put them to work |
|---|---|---|
| Guardian | Concussive blasts, enemy repulsion, Armor Beacon | Push enemies away before a revive or repair, and place armor recovery where teammates can reach it |
| Falconer | Assault drone, remote drone revive, electric damage support | Send the drone after threats and use remote revives when approaching a fallen teammate would expose you |
| Retcon | Rewind ability that restores a saved position and resources, Rage, emergency revival passive | Establish a safe rewind point before committing ammunition and health to an aggressive attack |
| Spotter | Enemy detection, vulnerability darts, deployable ammunition | Mark dangerous targets, reveal approaching enemies, and support extended firefights |
| Slicer | Frontal energy-blade attack, dash, forward-facing shield | Cut through clustered enemies, dash out of pressure, and face the shield toward ranged threats |
Guardian: Create room for the team
Guardian’s repulsion gives the squad breathing room during crowded objectives. Use it when enemies are interfering with a revive or elevator repair.
In RC: EA:03:02:00, Armor Beacon restores up to 100% armor, improving on its earlier recovery limit. Drop it where teammates can stand together without abandoning the objective.
Falconer: Keep the drone working
Falconer combines autonomous offense with a way to revive teammates remotely. Direct the drone toward a specific enemy when you need concentrated damage.
Choose Bio-Booster upgrades with your intended focus in mind: Falconer’s decks include drone damage and cooldown support, alongside electric damage interactions.
Retcon: Set the return point before taking risks
Retcon’s rewind saves a position and status, then returns you there with the saved ammunition, health, and armor when triggered again.
Activate the setup from a defensible location. Spend resources during the attack, then rewind before the situation overwhelms you. Saving your status after taking heavy damage leaves you with a much weaker recovery point.
Spotter and Slicer: Coordinate your pressure
With Spotter, mark the enemy your teammates are already shooting or the threat that needs to disappear next. Deploy ammunition where the team can collect it during the fight.
With Slicer, use the blade against groups in front of you and keep dash available when committing to close combat. Position the forward-facing shield between incoming projectiles and teammates who need protection.
Build Permanent Progression Between Missions
Before launching again, visit the Mission Terminal, Operations Command, and Loadout Terminal. These systems handle different parts of your progression.

Match missions to Intel tasks
Intel tasks award points toward Security Clearance. Update 3 reworked the clearance track, its tasks, and reward requirements, so use the objectives displayed in your current terminal.
Pick missions that advance those tasks. Security cameras, terminals, and points of interest can contribute to progression, so inspect the requirements before heading underground. Claim completed Intel rewards between runs.
Alpha Security Clearance is automatically granted to new Reclaimers following Update 2. You can access the Grenade Locker and start Expenite Events during your opening missions.
Collect OpsCom rewards and equip Enhancements
Complete Operations Command tasks and claim their rewards. Update 3 makes Deployments available when their rank requirement is met, removing the previous Merit purchase requirement.
Some Deployments track team Corespawn kills or cleared facility levels, allowing progress even when the mission ends before victory.
Enhancements provide permanent loadout bonuses, including ammunition, critical damage, and Expenite carrying capacity. The system has four tiers and up to eight Enhancement slots per class.
Unlock slots and inspect what is equipped after purchasing upgrades. Choose bonuses that support the attacks and equipment you use regularly.
Set your Bio-Booster decks
Bio-Booster decks influence the class upgrades offered during a run. Review them at the Loadout Terminal before deploying.
Once deck swapping is unlocked, Update 3 also makes the classless Prowess deck available. Its theme centers on switching between your pickaxe, weapon, and grenades. Use that deck when you intend to rotate through those tools.
Check the Trophy Wall and cosmetic sheet
The Trophy Wall sits beneath the globe hologram in the Mission Terminal. Gatekeeper victories contribute toward armor paintjobs and permanent stat bonuses.
Spend Scrip through the cosmetic sheet. Update 3 gives items individual nodes, adds Merit rewards, and makes most cosmetic unlocks available across classes. If you played before that rework, revisit the sheet to spend the refunded Scrip.
Draft Equipment That Gives Your Build a Direction
At the start of a mission, teammates take turns selecting equipment. Use the heart icon to show interest in a weapon or upgrade, and communicate when an item directly supports your build.
 Image: Steam / Ghost Ship Games
Starting weapons are common and have two attributes following Update 1. Inspect those attributes before deciding which gun to take.
Choose a traversal tool with the facility’s complexity in mind. Platforms, ziplines, and other movement options solve different terrain problems, so coordinate coverage with your teammates.
The Flare Gun no longer occupies a traversal-tool choice. Since Update 3, it sits in a glass box at each facility entrance and goes into a separate slot. Pick it up before moving into the caves.
The XQ-2 Quantum Warp Field adds paired portals for crossing distances. Throw generators to establish the connection, use Reload to switch which generator will be replaced, and hold Reload to collapse the portals.
Build around attributes and reliable triggers
Upgrade synergy starts with what your equipment can activate:
- With an electric setup, look for interactions involving electrified enemies, electrical arcs, or movement after electrocution.
- With frozen-target damage, pursue effects that trigger when you hit frozen enemies.
- With grenade-focused equipment, inspect direct-hit and thrown-grenade effects.
- With corrosion, use its stacking armor penetration to help damage armored targets.
RC:EA:03:01:00 fixes elemental weapon attributes unlocking their corresponding upgrade pools. Adding a fire attribute to a GK2, for example, makes fire upgrades eligible to appear.
Explosion requirements matter too. Flash Bang and Double Explosion require the explosion attribute category. Read those conditions before choosing an upgrade for a weapon that cannot trigger it.
Turn Expenite, Workbenches, and Bio-Boosters Into a Build
Your power during a mission comes from several upgrade systems. Keep their roles straight so you can decide which detours are worth taking.
Collect and deposit Expenite
Since Update 3, enemies drop Expenite as a baseline feature. Mine nearby veins and collect drops while progressing toward objectives.
The Expenite Harvest Alteration changes that balance: its quarry has abundant veins, but enemies do not drop Expenite.
To turn collected Expenite into upgrades:
- Call the deposit drone with C on keyboard.
- Deposit your minerals with E.
- Fill the team’s upgrade bar.
- Press the upgrade button on the R.E.P.D. when it becomes available.
The lighter portion of the progress bar shows the contribution of Expenite your team is carrying. Check it before taking another mining detour; the squad may already have enough for the next upgrade.
Teammates no longer need to gather around the drone. One Reclaimer can initiate the upgrade process, which links the whole team regardless of location.
Choose upgrades for effects you can use
Upgrade negotiations changed in Update 1:
- A selected card is replaced, preserving the number of choices for later players.
- Every upgrade in a draft has the same rarity.
- Health upgrades appear in the regular pool.
- The old Skip for Health option is gone.
Compare the offered effects against your current equipment. Take an upgrade that improves a frequent attack or solves a survival problem. Avoid committing to a trigger you cannot reliably activate.
These upgrades strengthen the current run; Enhancements handle permanent loadout progression between missions.
Repair Workbenches and choose deliberately
Interact with a Workbench to locate its toolbox, then carry the toolbox back to repair it.
The bench offers choices involving class abilities, equipment upgrades, or additional equipment. You get one choice per Workbench, so inspect the alternatives before selecting.
Workbenches can offer higher-rarity weapons and traversal tools. If your current weapon struggles to handle the threats ahead, compare a replacement with upgrading what you already carry.
Open Bio-Boosters and collect Flux Quartz
Complete a Bio-Booster’s timing-based hacking minigame to access its upgrades. These choices are personal to your character, allowing you to develop your deck without competing over the same card.
Collect Flux Quartz from cave walls for the Refractor reroll system. It can reroll Expenite upgrades and Artifacts or provide a small health boost.
At the start of a level, the timer remains paused until the first Reclaimer leaves the elevator. Finish reroll decisions before anyone steps out.
Explore With the Timer in Mind
Each floor asks you to balance extra power against rising time pressure. Watch the timer and incoming-wave indicators while deciding whether to start another event.
Reaperworms arrive when the level timer expires. Enable the numerical countdown if you want a clearer view of the remaining time.
On Threat Levels 4 and 5, stage waves can stack. Check for an incoming wave before triggering an event that summons additional enemies.
Prioritize detours that solve a problem
Visit nearby Workbenches and Bio-Boosters to strengthen the run. Start Expenite Events when the team has the supplies and time to finish them.
Use unlocked Data Terminals to reveal points of interest and plan your route. Collect security cameras when they advance an Intel task, especially if your traversal tool makes them easy to reach.
Avoid crossing the floor repeatedly for scattered rewards. Keep the elevator route in mind while collecting upgrades along the way.
Share supplies
Munitions Crates restore 50% ammunition and armor. Their charges scale with squad size, so take one charge and leave the others for teammates.
Use Armor Crates to restore armor and Red Sugar to heal. Check your ammunition before starting a lengthy event or exit objective.
Watch threats above and beside you
Corespawn can approach along walls and ceilings. Check overhead before committing to mining or interacting with a terminal.
Voidkin Drifters are mobile ranged attackers that pause to charge their shots. Use that pause to aim. Give Voidkin Dominators space when they die because they release an explosion.
The Bloater also damages nearby targets when it bursts on death. Step back before delivering the finishing damage at close range.
Complete the Elevator Objective and Read Every Risk Vector
Update 3 adds alternatives to the familiar elevator defense. Identify which objective you have before spending your remaining time elsewhere.
Defend the drive unit
Activate the elevator, then protect its drive unit while waiting for the lift.
Keep someone close enough to repair damage while the others control approaching enemies. Repair with E while looking at the damaged unit.
Use Guardian’s repulsion to clear space around the machinery, Falconer’s remote revive to recover a teammate, or Slicer’s shield against incoming projectiles. Board once the elevator arrives.
Collect the missing gears
Find the elevator’s missing gears, carry them back, and reinstall them in the drive unit.
Use the Terrain Scanner to locate dropped gears. RC: EA:03:02:00 makes their scanner markers larger and changes their color to improve visibility.
Remove Blister Growths
Destroy the growths covering the elevator. Attacking them triggers a Corespawn response, so prepare the squad before opening fire.
Evaluate the next Risk Vector
Between floors, choose between Risk Vectors that pair a penalty with a benefit. Their effects accumulate across the mission, making later choices part of the same risk calculation.
Read both halves of each option. An extra Workbench or Bio-Booster is useful, but the attached penalty still needs to fit what your squad can handle.
Avoid stacking penalties that worsen your existing weakness. If airborne enemies are already consuming your ammunition, think carefully before selecting Drifter Surge, which adds more Voidkin groups.
Prepare for the Gatekeeper Fight
Before activating the boss, locate ammunition, check the arena, and identify room to move. Leave supplies available for later stages of the fight.
Update 2 removes the boss invulnerability phases previously triggered by dealing heavy damage quickly. Bosses instead use brief blocks or defenses that call for aiming around them, area damage, or repositioning.
When shots are being blocked, change your angle rather than emptying another magazine into the defense.
Gootoorak Gatekeeper
Clear nearby enemies, then activate the red orbs to begin the encounter.
The fight has three stages, with destroyed orbs thrown into the central pit to advance it. Watch for green sludge, spiral attacks, and the charged laser while handling those objectives.
Keep the ammunition crates around the arena available until you need their ammunition and armor recovery.
Balgorath at Depth 4
Balgorath uses patterned ranged attacks, and its projectiles also block your shots. Keep moving, manage distance, and shoot through openings instead of firing into the projectile screen.
Some ground-ring attacks require jumping. RC: EA:03:02:00 makes the rings thinner to improve clearance on uneven terrain.
Rift-enhanced boss missions
Marked facilities can end with a vote that applies an Enhancement to the Gatekeeper encounter. These modifiers can change the fight’s demands and victory requirements.
Read the options before voting. Choose the challenge your current equipment can handle, and preserve the ammunition and abilities needed for that version of the encounter.
Continue with
 Deep Rock Galactic Rogue Core vs Deep Rock Galactic: GuideDeep Rock Galactic Rogue Core vs Deep Rock Galactic: compare classes, loot, combat, progression, and current updates before choosing your next co-op game.
Continue exploring

Deep Rock Galactic Rogue Core Progression Guide: Unlocks
Deep Rock Galactic Rogue Core progression guide: unlock Clearance, build Enhancements, earn Merits, and use Update 3 systems to strengthen each new run.

Deep Rock Galactic Rogue Core Solo: Tips for Better Runs
Deep Rock Galactic Rogue Core solo guide covering Cooper commands, Assault Pace, builds, upgrades, and Save & Quit. Make your next descent more manageable.
Join the community
Official channels for news, updates and player help: