
Early access · Release date: May 20, 2026
UpdatedDeep Rock Galactic Rogue Core Solo: Tips for Better Runs
Deep Rock Galactic Rogue Core solo guide covering Cooper commands, Assault Pace, builds, upgrades, and Save & Quit. Make your next descent more manageable.
Jump to
Can You Play Rogue Core Solo?
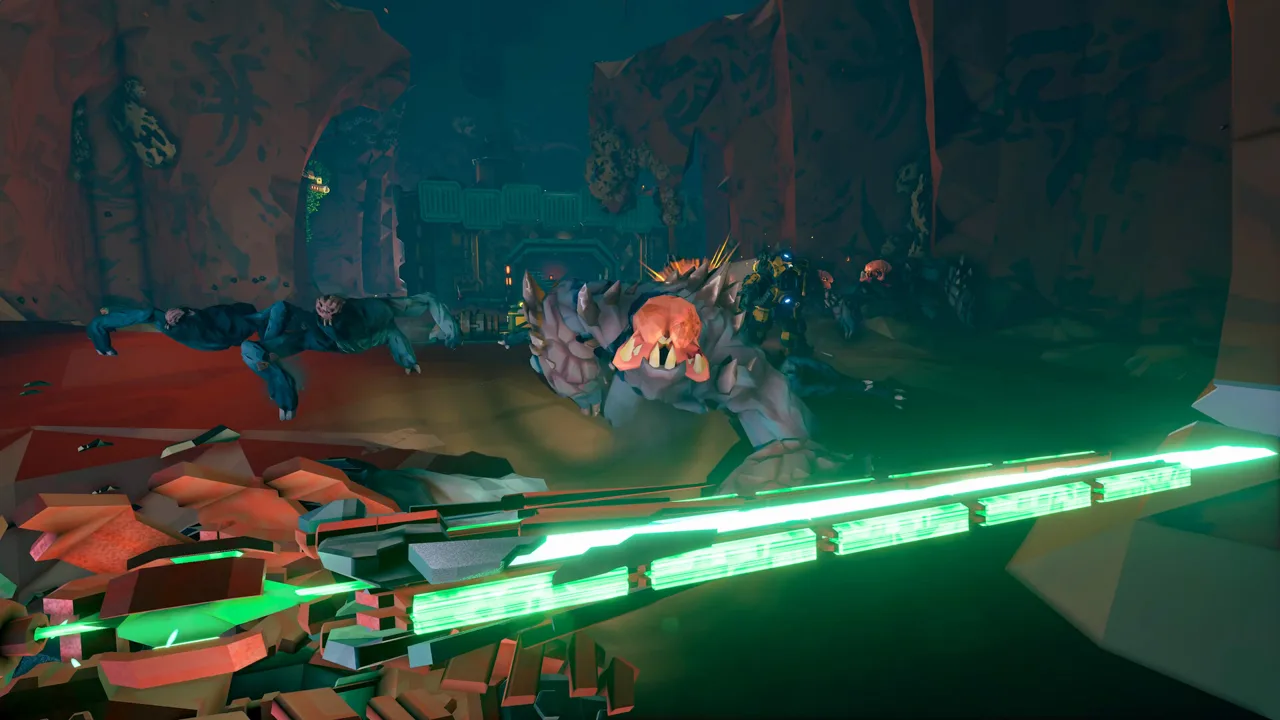
You can play Deep Rock Galactic Rogue Core solo, with Cooper helping you fight, mine, carry equipment, and recover from knockdowns. The challenge is handling combat, navigation, and objectives while the mission timer keeps moving. Start with Cautious Assault Pace, put Cooper to work, and build around surviving the entire descent.
Rogue Core supports one to four players. Its roguelite structure means you begin missions with basic equipment and assemble your weapons, upgrades, and abilities during the run, while permanent character progression carries between missions.
The current Early Access experience also differs substantially from launch. Enemies now drop Expenite, elevator objectives have more variety, and the November 11 update added Save & Quit for solo runs.
Choose Your Assault Pace Before Deploying
Assault Pace changes the time available to complete each level and affects mission XP rewards:
- Cautious: Lower time pressure.
- Standard: The original pacing option.
- Reckless: Higher time pressure.
Choose Cautious while learning the terrain scanner, objective interactions, and Cooper commands. Enable the optional numerical countdown if you want to see exactly when Reaperworms will appear. The timer’s final segment also has a distinct appearance to warn you that time is running short.
Official page: Deep Rock Galactic Rogue Core (store.steampowered.com)
Use Cooper as an Active Partner
Cooper handles much more than covering fire. Use your laser pointer to direct him toward tasks instead of leaving him to act on his own throughout the mission.

Delegate Mining and Toolbox Transport
Point Cooper at Expenite or Red Sugar while you handle nearby threats or prepare your route. Mining breaks resources loose; collect the dropped chunks afterward.
For weapon upgrades, point at the toolbox and have Cooper carry it to the workbench. This frees you to move and fight while he follows. Check that he has picked it up before heading off, then wait for him at the workbench and complete the delivery.
When carrying the toolbox yourself, charge a forward throw, move to it, pick it up, and repeat. Use this to cover open stretches without walking the entire distance under the carrying slowdown.
Upgrade His Utility
Give Cooper’s upgrade choices attention alongside your own. When your available character upgrades do little for the build, prioritize support that helps you stay mobile and control enemies.
Favor these options when offered:
- Stun chance and fire rate for crowd control.
- Movement speed for faster carrying and quicker responses to Cave Leeches.
- Extra rockets for additional combat support.
Cooper can revive you, but keep those recoveries as an emergency resource. Check ceilings for Cave Leeches and clear space before committing to lengthy interactions.
Pick a Reclaimer and Build Your Progression
The five Reclaimers bring different tools into a solo run. Choose a kit whose abilities you can use consistently under pressure.

| Reclaimer | Signature tools |
|---|---|
| Guardian | Concussive attacks, area denial, and armor restoration |
| Falconer | An airborne assault drone that electrifies enemies, plus remote teammate revival |
| Retcon | Rewinding to a previous position while recovering health and ammo |
| Spotter | Toxin darts that highlight and weaken targets, enemy detection, and deployable ammo |
| Slicer | An energy blade and an aggressive, mobile melee kit |
Pick Guardian if you want to practice controlling space and restoring armor. His Armor Beacon now restores up to 100% armor following the November 11 update. Choose Retcon if you want to learn around a recovery ability, or Spotter if you prefer marking targets and managing extended firefights.
Falconer’s remote teammate revival and Cooper’s solo revival are separate mechanics. Choose Falconer for the drone’s combat tools when playing alone.
Focus Your Early Character Levels
Commit to one Reclaimer until character level 15, when you can ascend. This milestone also unlocks Gauntlets, which provide another route to Merits. After that, level a second character toward ascension.
Ascending two characters unlocks Bio-Booster deck swapping. Use it to bring choices from another ascended class into your build. Update 3 also added the classless Prowess deck, available when deck swapping unlocks, with a focus on alternating between your pickaxe, weapons, and grenades.
Visit OpsCom between runs and claim completed task rewards. Since Update 3, Deployments become available when their rank requirement is met; they no longer require a Merit purchase.
Route Through Upgrades Without Clearing Every Corner
Find the data terminal early when your route allows it. Completing its code puzzle reveals points of interest across the map, helping you plan around upgrades and objectives.
 Image: Steam / Ghost Ship Games
For the terminal puzzle, read the final three numbers of the target code first. Find the matching number group on the terminal, then compare the opening characters. This narrows the search before you inspect individual entries.
Build your route around:
- A Bio-Booster pod.
- An equipment workbench and its toolbox.
- The elevator objective.
- Nearby resources and events worth the time required.
Evaluate events before starting them. Skip a lengthy excavation when digging for geodes would consume the time you need for upgrades or extraction. Depositing a Swarm Geode triggers a horde, so inspect what you are turning in.
Adjust Your Mining Habits for Update 3
Enemies now drop Expenite as a standard mechanic, and mineral veins are less frequent to balance that additional income. Collect combat drops along your route rather than treating every distant vein as mandatory.
The Expenite Harvest Alteration reverses that balance: its facilities contain abundant veins, but enemies do not drop Expenite. Plan for more mining when selecting it.
At a vein, call the R.E.P.D. before starting to mine so it can arrive while you work. Break out the main deposit and move on instead of spending precious time chasing tiny remnants.
Also collect Flux Quartz when it is accessible. You can spend it to reroll Expenite upgrades and Artifacts or convert it into a small health boost.
Build for Damage, Healing, and Mobility
Prioritize upgrades that help with both immediate survival and the eventual boss fight. Weak-point damage supports focused attacks against large targets, while upgrades that generate Red Sugar give you healing during combat.
Choose effects your equipment can trigger reliably. If an upgrade depends on melee hits but you rarely use your pickaxe or blade, take a benefit that fits your actual attacks instead.
Secure a Useful Second Weapon
At the first workbench, take an additional weapon when the offered gun fills a gap in your loadout. Avoid spending the choice on a weapon you will struggle to use.
If the offer is poor, consider a Heavy Weapon Crate Risk Vector when one appears. Balance its downside against the benefit of expanding your arsenal.
Use Flux Quartz rerolls to replace upgrades that contribute little to the run. Update 3 keeps the level timer paused until you leave the elevator, so handle available rerolls before stepping out.
Bring a Tool for Vertical Routes
Choose traversal equipment that helps you reach elevated objectives and escape awkward terrain. The anti-gravity emitter, Zipline Gun, and Platform Gun all provide ways to handle vertical obstacles.
Update 3 added the XQ-2 Quantum Warp Field, which connects two thrown generators. Use paired portals to connect positions you expect to revisit. Placing another generator replaces the oldest by default; the Reload input lets you change which one is replaced, and holding Reload collapses the portals.
Grab the Flare Gun from the glass box at the facility entrance. It now occupies a separate slot, letting you carry lighting alongside your traversal tool.
Choose Risk Vectors and Prepare the Elevator Early
Read both sides of every Risk Vector. An appealing reward can become expensive if its penalty undermines your current damage or crowd control.
Prioritize an Artifact reward when the accompanying downside fits your build. Be especially cautious about doubling Creeper health: making common swarm enemies tougher increases the work required to maintain breathing room.
Extra Bio-Booster and Workbench Risk Vectors add another upgrade opportunity to the next level. Choose them when you can reach and use the additional station without sacrificing the elevator objective.
Check Which Elevator Objective You Have
Update 3 expanded elevator objectives beyond defending the Drive Unit. Identify the task early:
- Drive Unit defense: Keep the unit operating while waiting for the elevator.
- Collect Gears: Find missing gears, bring them back, and reinstall them.
- Remove Growths: Destroy the Blister Growths covering the elevator; attacking them triggers a Corespawn response.
Prepare supplies and identify your escape routes before starting a fight around the elevator. During defense, keep moving, watch the unit, and return to clear attackers or repair it when necessary.
Reserve time for the objective itself. Leave optional mining behind when completing the remaining task would push you into the timer’s final segment.
Prepare for Boss Mechanics Before Spending Your Ammo
Restock ammo and armor, collect accessible Red Sugar, and finish useful upgrades before committing to the boss encounter. Keep enough attention on the arena to recognize objective items and attack openings.
Against Ramok, use the gatestone and rift mechanic during the relevant phase. Stop firing when the boss is invulnerable and focus on completing the interaction.
At Depth 4, Balgorath Gatekeeper fills the arena with patterned ranged attacks. Its projectiles also block your shots, so reposition for a clear opening instead of firing into the obstruction. Maintain space to dodge and jump the ring attacks.
The November 11 update made Balgorath’s ground and rising rings thinner and reduced the damage from its Corestone grab. Keep watching the patterns and your footing, especially on uneven terrain.
Clear Up Your View
Reduce visual movement if it makes tracking enemies and weak points difficult:
- Turn off view bob.
- Lower camera shake.
- Disable mouse smoothing.
- Try photosensitivity mode to reduce distracting effects.
Adjust field of view to suit your display and comfort. Keep important threats visible without making distant targets too difficult to aim at.
Save a Solo Run and Return Later
The November 11 RC: EA:03:02:00 update added Save & Quit for solo missions. You can save an unfinished run, leave the game, and return to it later.
The resume screen offers Resume Mission to continue or Claim And Abort to end the run and collect its earned rewards.
Use Save & Quit when you need a break. Choose Claim And Abort when you want to finish that attempt and take the rewards already earned.
Continue with
 Deep Rock Galactic Rogue Core Crossplay: Can You Play?Deep Rock Galactic Rogue Core crossplay explained: explore Steam co-op, console availability, and the multiplayer updates that keep your squad together.
More in Multiplayer
See all Multiplayer
Continue exploring

Deep Rock Galactic Rogue Core vs Deep Rock Galactic: Guide
Deep Rock Galactic Rogue Core vs Deep Rock Galactic: compare classes, loot, combat, progression, and current updates before choosing your next co-op game.
Deep Rock Galactic Rogue Core Steam: PC Player Guide
Deep Rock Galactic Rogue Core Steam guide: explore PC co-op, Early Access, the free weekend, bundle discounts, solo saving, and Update 3 before you play.
Join the community
Official channels for news, updates and player help: